
Generating Code
Code Generator automatically generates the repetitive source code you would otherwise write by hand — entities, services, repositories, UI code, and more — based on your project's table schema. What code is generated, and in what form, is determined by what a Template Pack defines.
Template Packs
A Template Pack is a bundle that captures "which code to produce from this schema, and how." NeoSQL just reads the schema and hands it over; the shape of the actual output is determined by four things:
- Which files to produce (Templates) — Each template in the pack defines one file to generate — entity, repository, DTO, service, CRUD screen, and so on. A file type the pack doesn't include simply won't be generated.
- Which language & types (Language Profile) — Sets the target language/framework and the rules that map DB column types to language types. The same table yields Java from a Java pack, TypeScript from a TS pack.
- Where and how to place it (Installation rules) — Each template decides which project path and filename the generated file lands at, or where inside an existing file a snippet gets injected.
- Values that fill the blanks (Variables) — Values that go into the code — package name, entity name, and so on — are taken as global, per-table, and per-field variables, filled differently for each project.
There are three ways to use a template pack: 1. Use a public pack from the Store as-is (Add Template Pack in project settings) 2. Clone a public pack from the Store and modify it 3. build your own to match your team's or project's coding conventions You can also use several packs in one project to generate multiple sets of source code.
How It Works
Code generation takes three steps. After a one-time setup, you can generate source code by right-clicking a table in the project's left-hand tree.
| Step | Where | What you do |
|---|---|---|
| 1. Add packs | Project Configuration → Code Generator tab | Add template packs and configure the code install Location and global variables. |
| 2. Tune tables (optional) | Table detail → Code Generator tab | Adjust per-table settings such as entity name and type mappings. |
| 3. Generate | Sidebar tree → right-click a table | Click "Generate Source Code...", review the preview, then install or download. |
You can add several packs to one project at once. For example, add a Java backend pack and a TypeScript frontend pack together, and a single source-code generation produces code for both languages.
Adding Template Packs
Everything starts in the Code Generator tab of Project Configuration.
Open the Code Generator tab
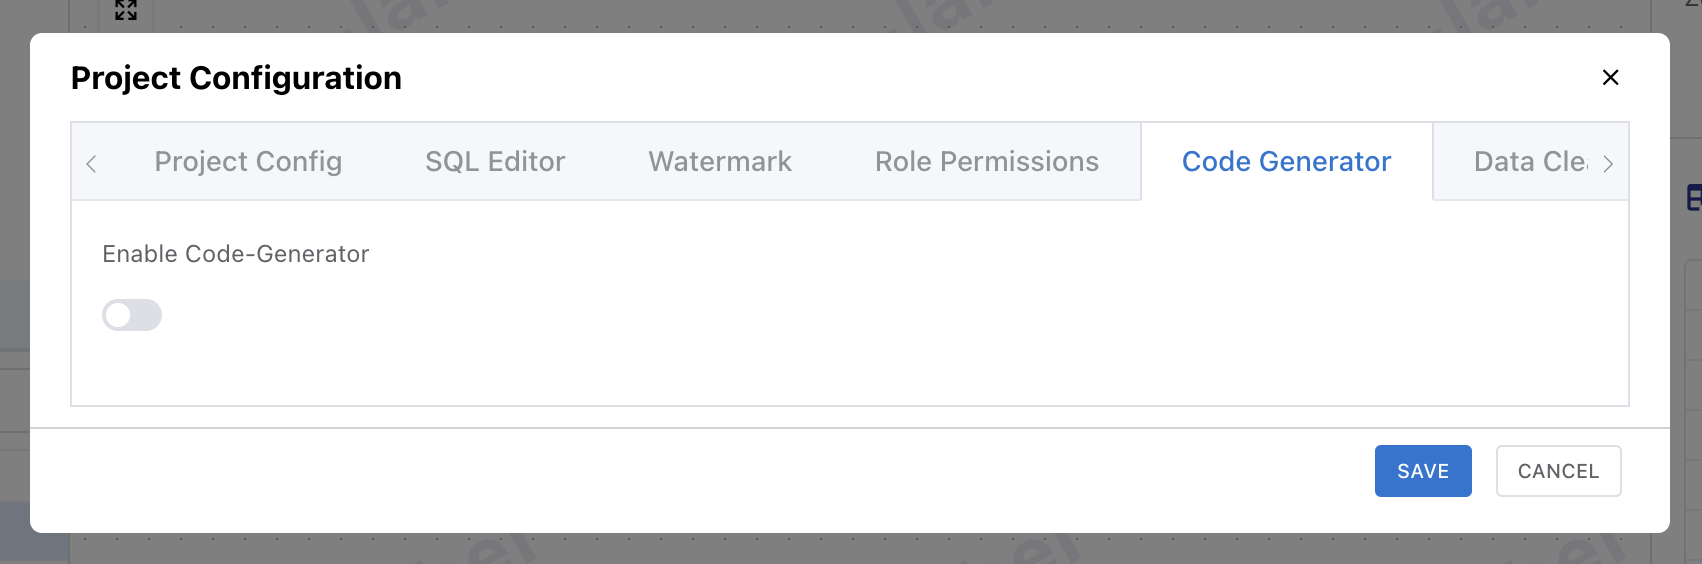
Open Project Configuration and go to the "Code Generator" tab. When setting it up for the first time, turn on the "Enable Code-Generator" switch to show the settings.
Add a template pack
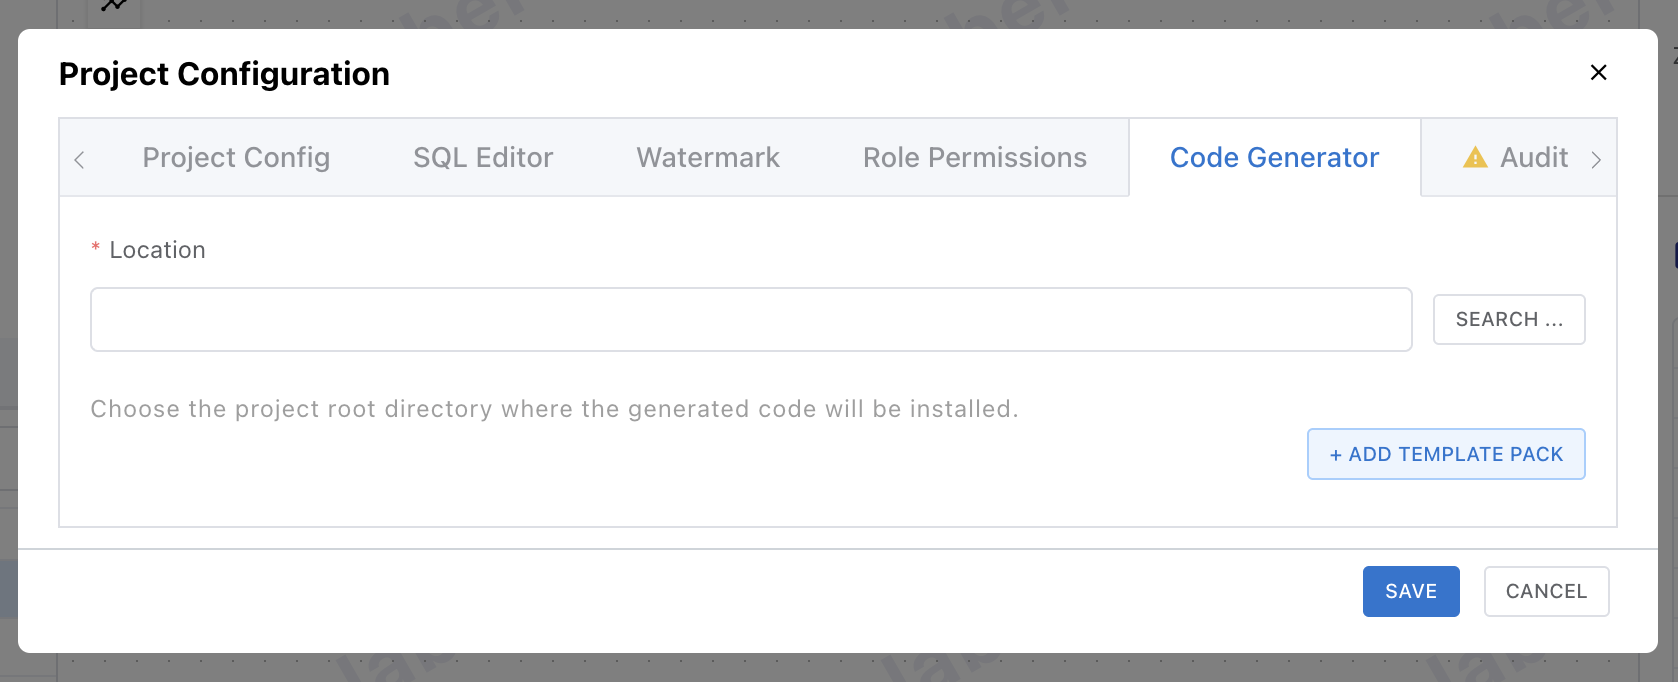
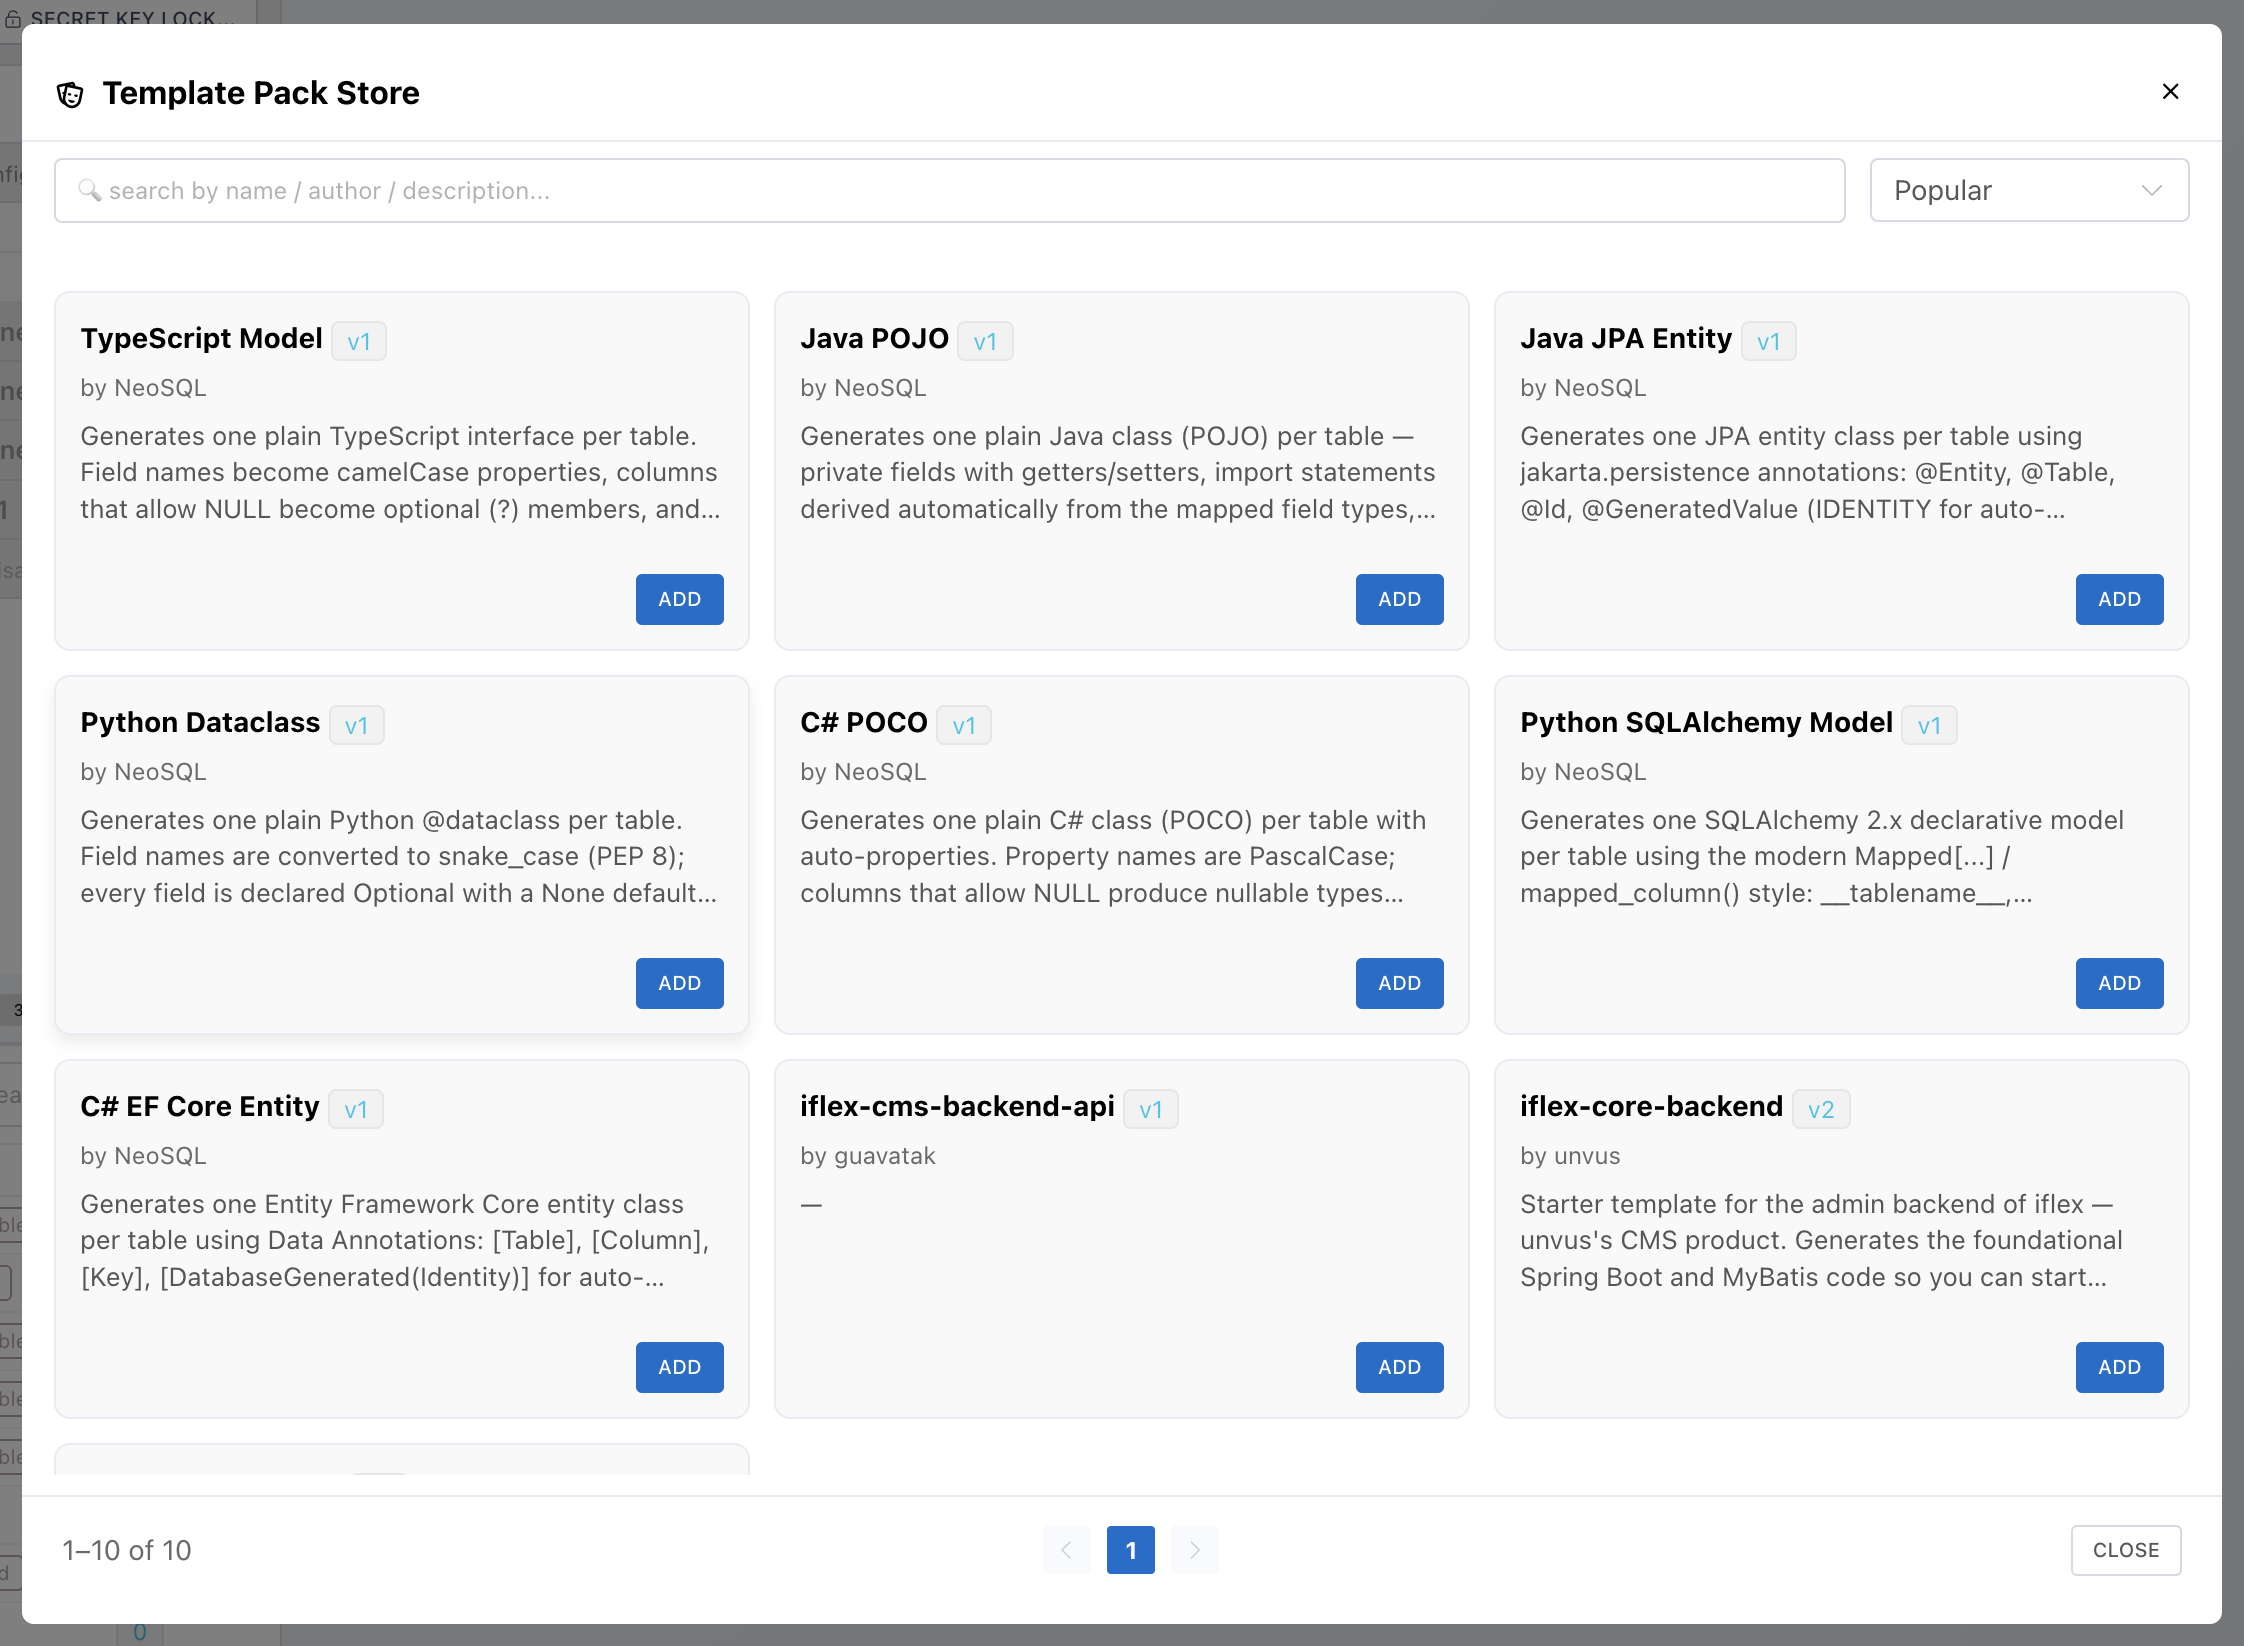
Click [+ Add Template Pack] to open the Template Pack Store. It lists public packs together with private packs you are a member of — click [Add] on a card to add it to the project.
Set the Location (desktop)
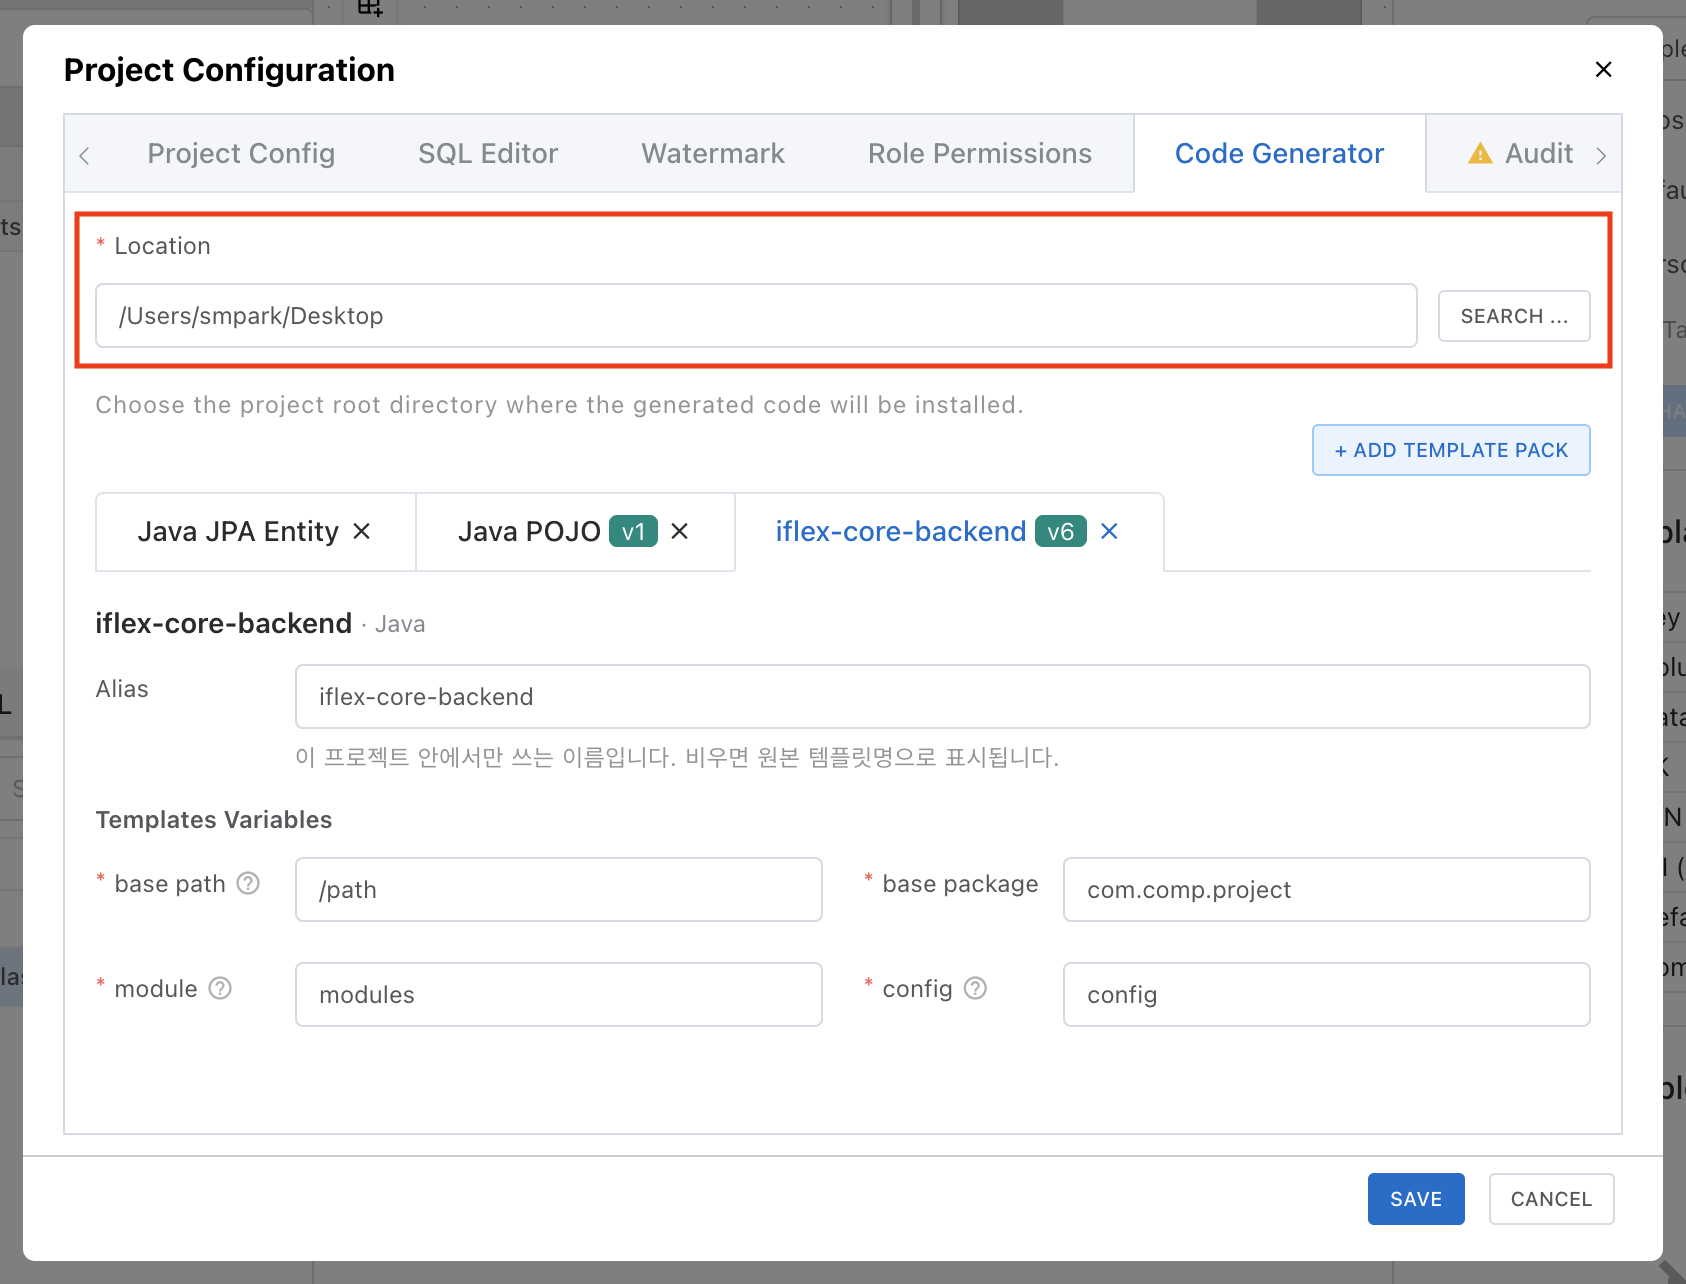
Specify the root directory of the local project where generated code will be installed. This is desktop-only; on the web you download a ZIP instead of installing.
Adding the same pack twice & Alias
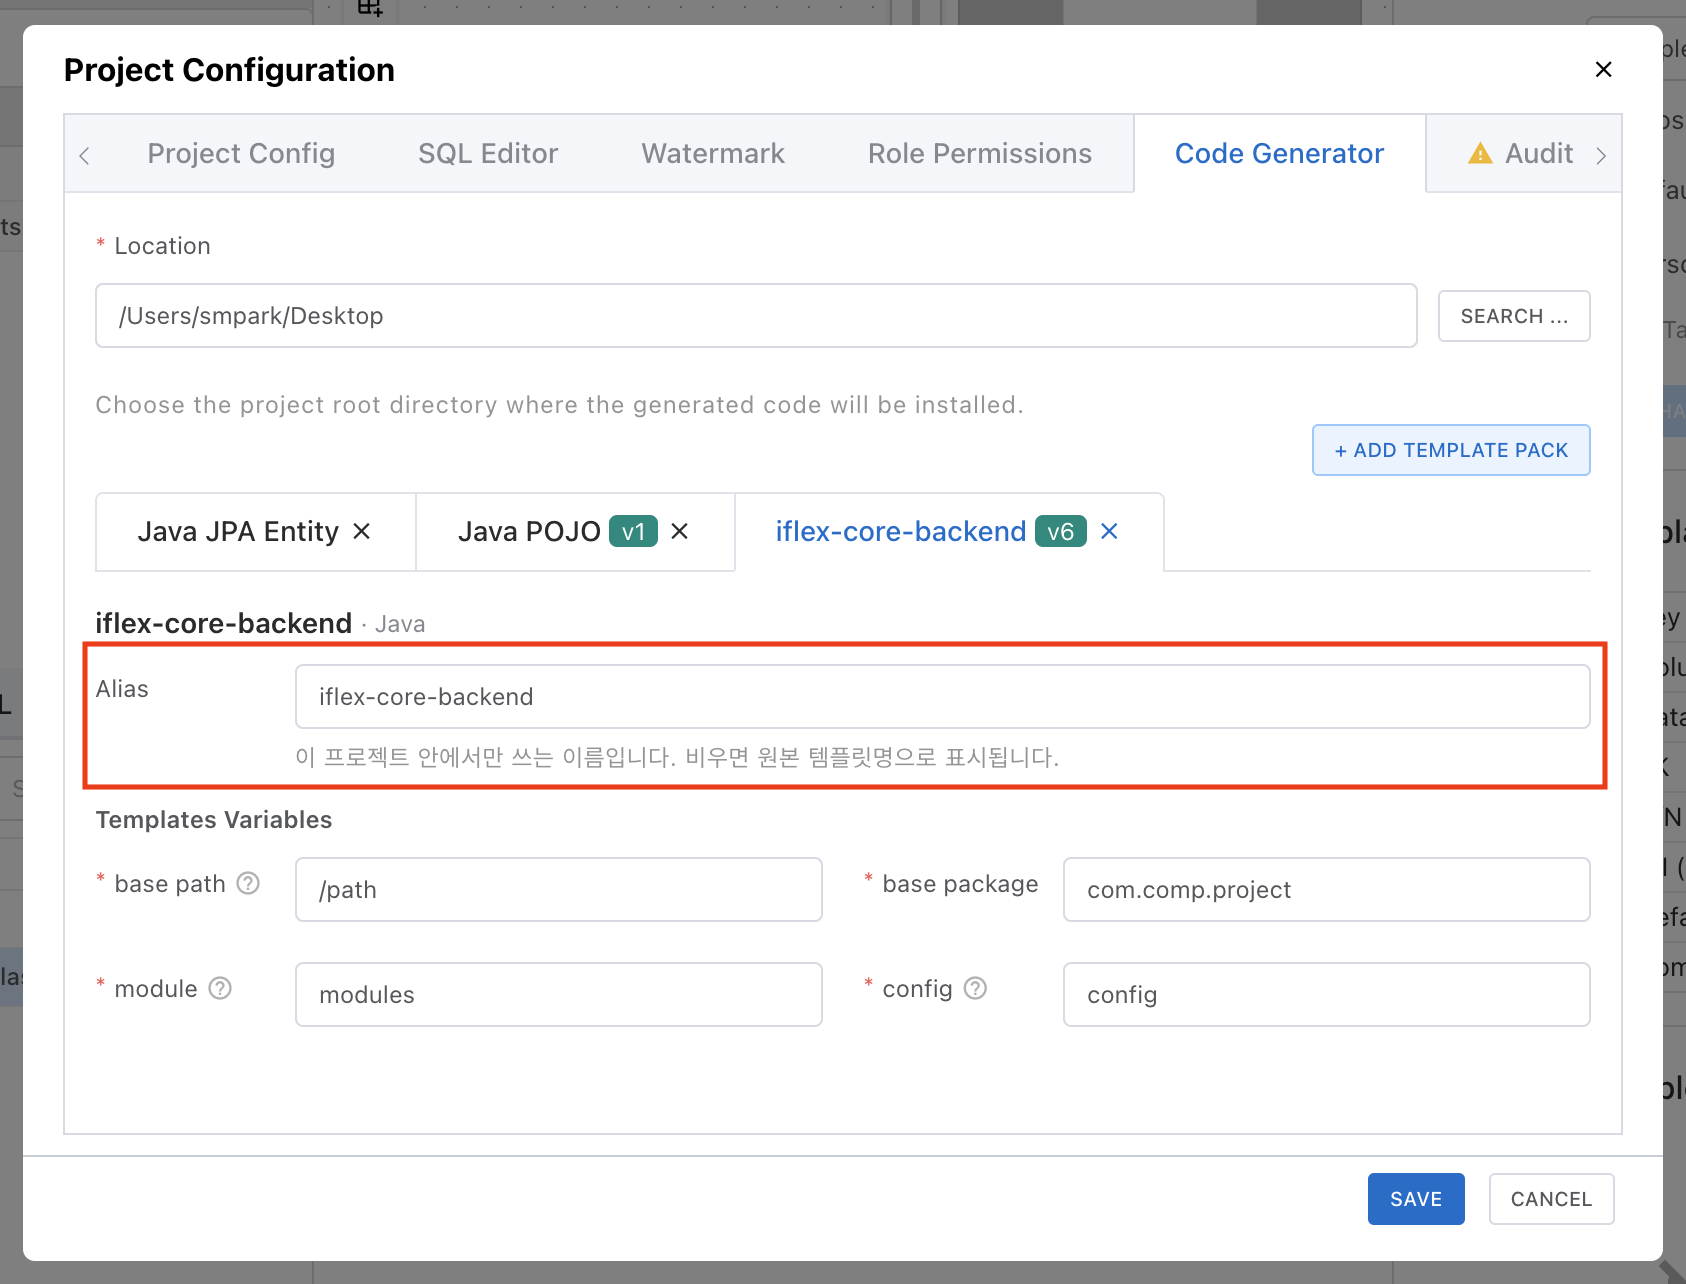
You can add the same pack to one project more than once — handy when each module needs different variable values. Use the Alias input on each pack tab to give it a name used only inside this project.
Global Variables
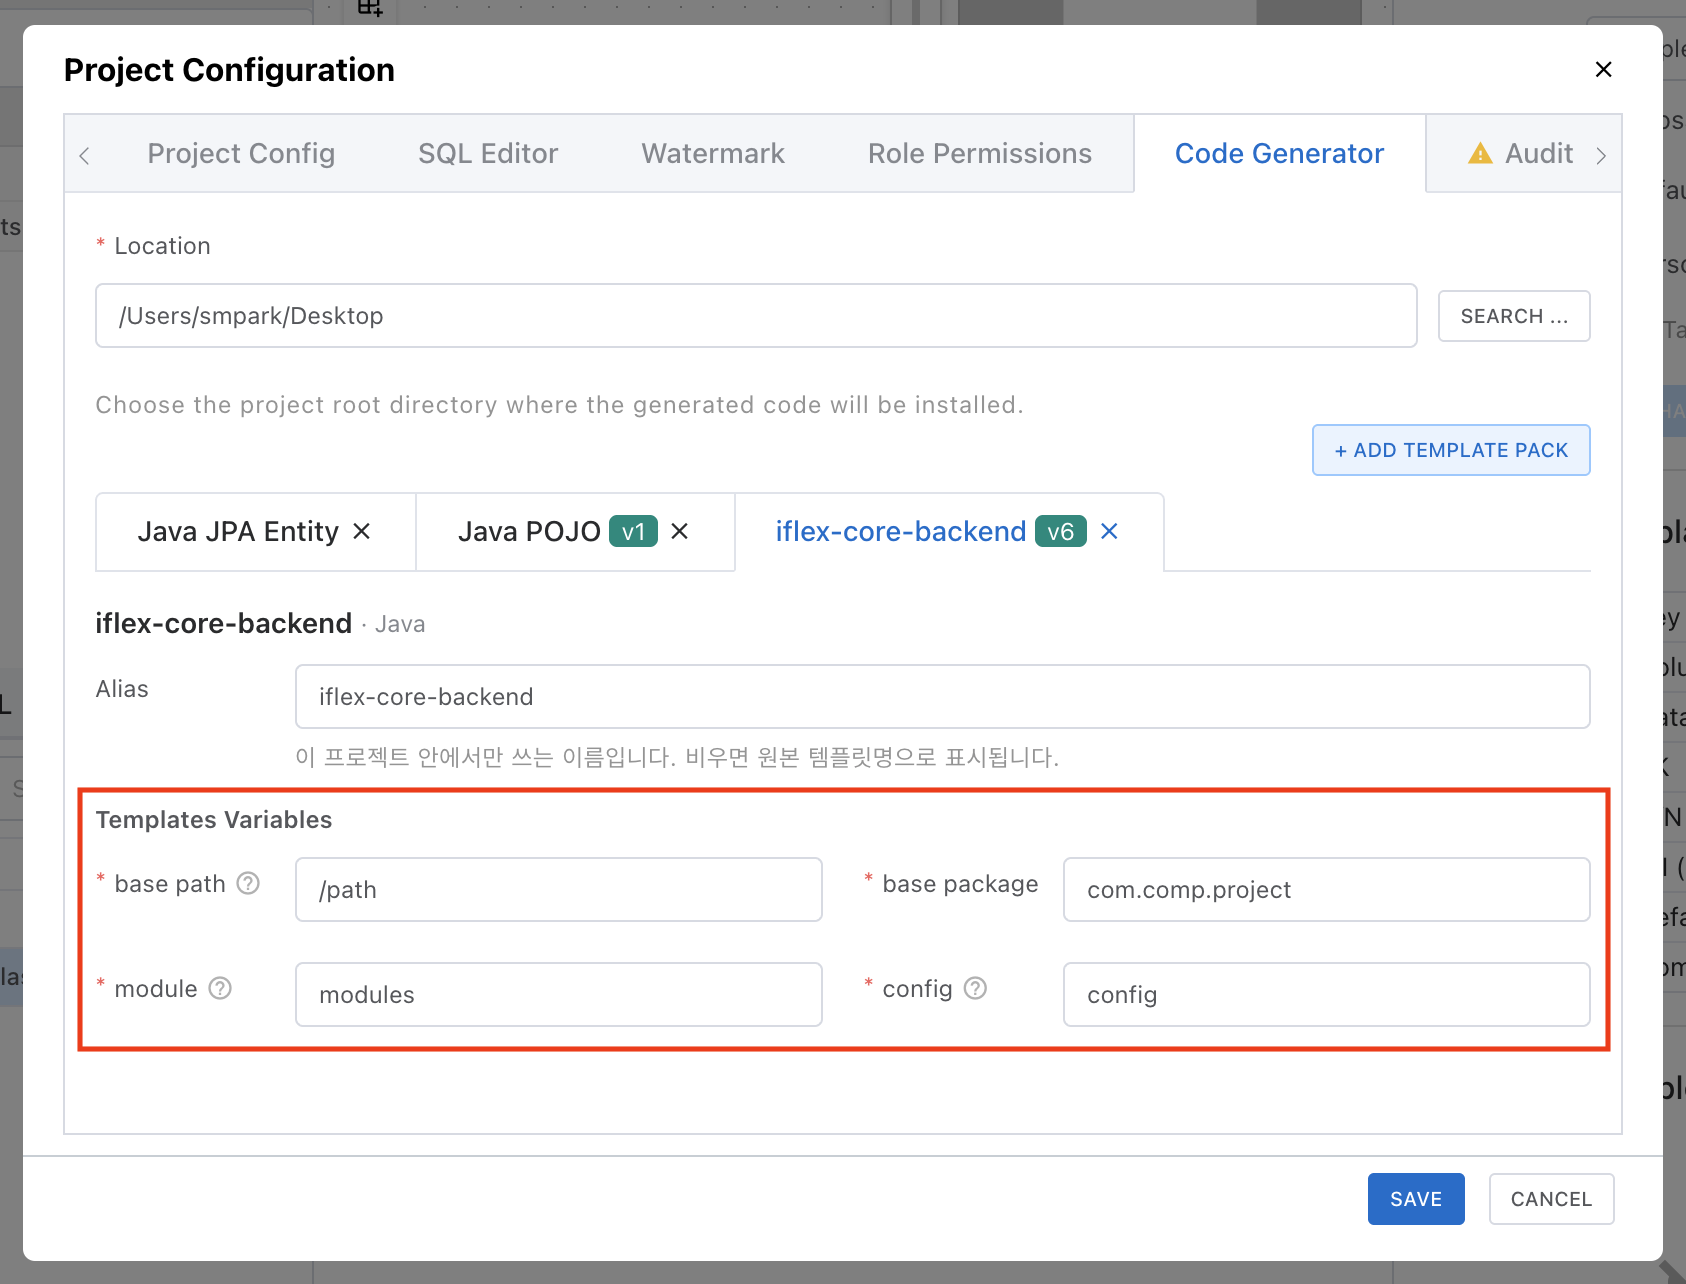
If a template pack declares global variables, a Templates Variables form appears under its pack tab. This is where you enter values used commonly across the whole project, such as the base package name.
Which variables you need to enter depends on the pack. The form is shown automatically based on the definitions declared in that template pack (label, default, whether required), and you can save only once all required variables are filled in.
Note: A pack with nothing to configure shows "This template pack has no configurable items (modules/variables)" — in that case you can use it right away just by adding it, with no extra setup.
Pack Versions & Upgrades
A project generates code against the specific pack version that was current when the pack was added. Even if a newer version is published later, it is not applied to existing projects automatically — the latest version takes effect only when you upgrade yourself.
Upgrading
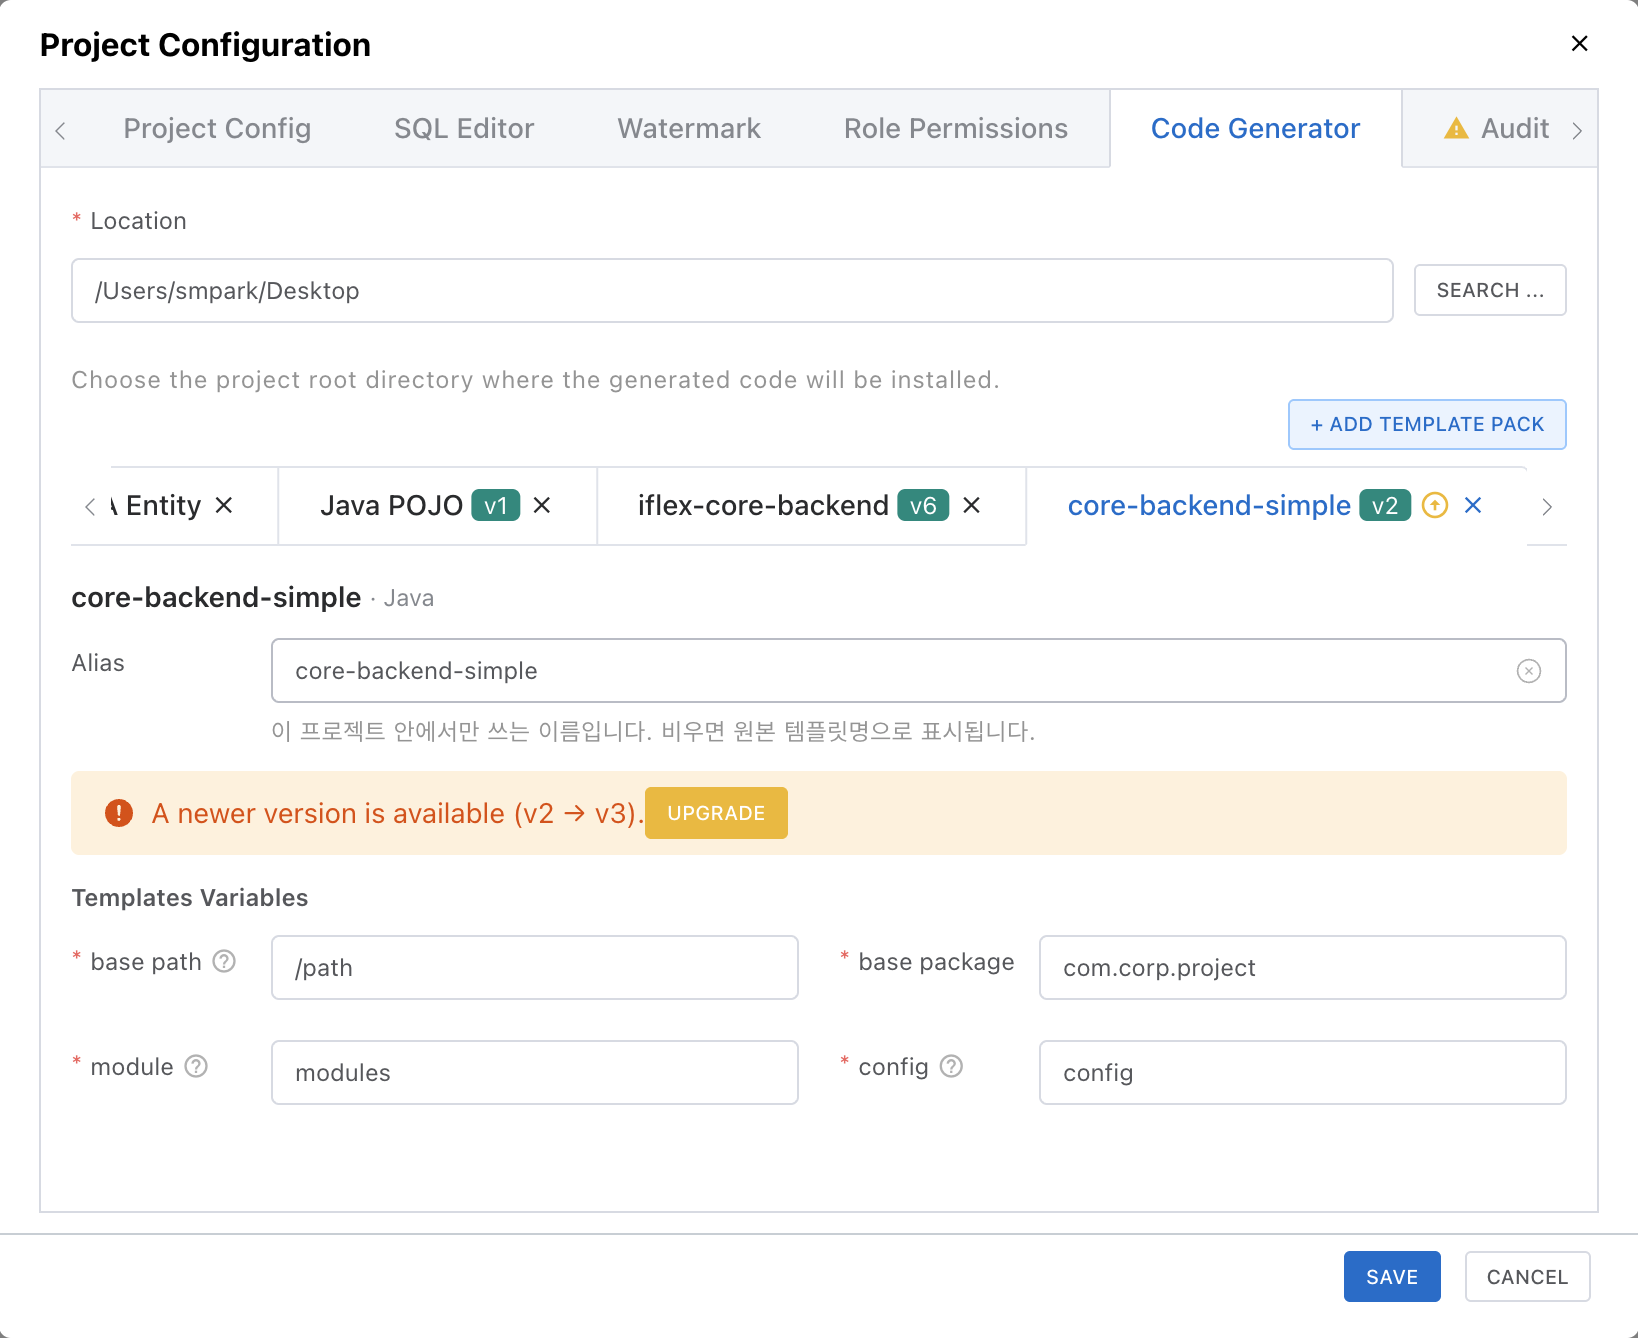
When the author of a pack you've added publishes a new version, the pack tab in Project Configuration shows an "A new version is available" alert with an [Upgrade] button. Clicking Upgrade overwrites the existing pack content with the new version.
Live (my draft)
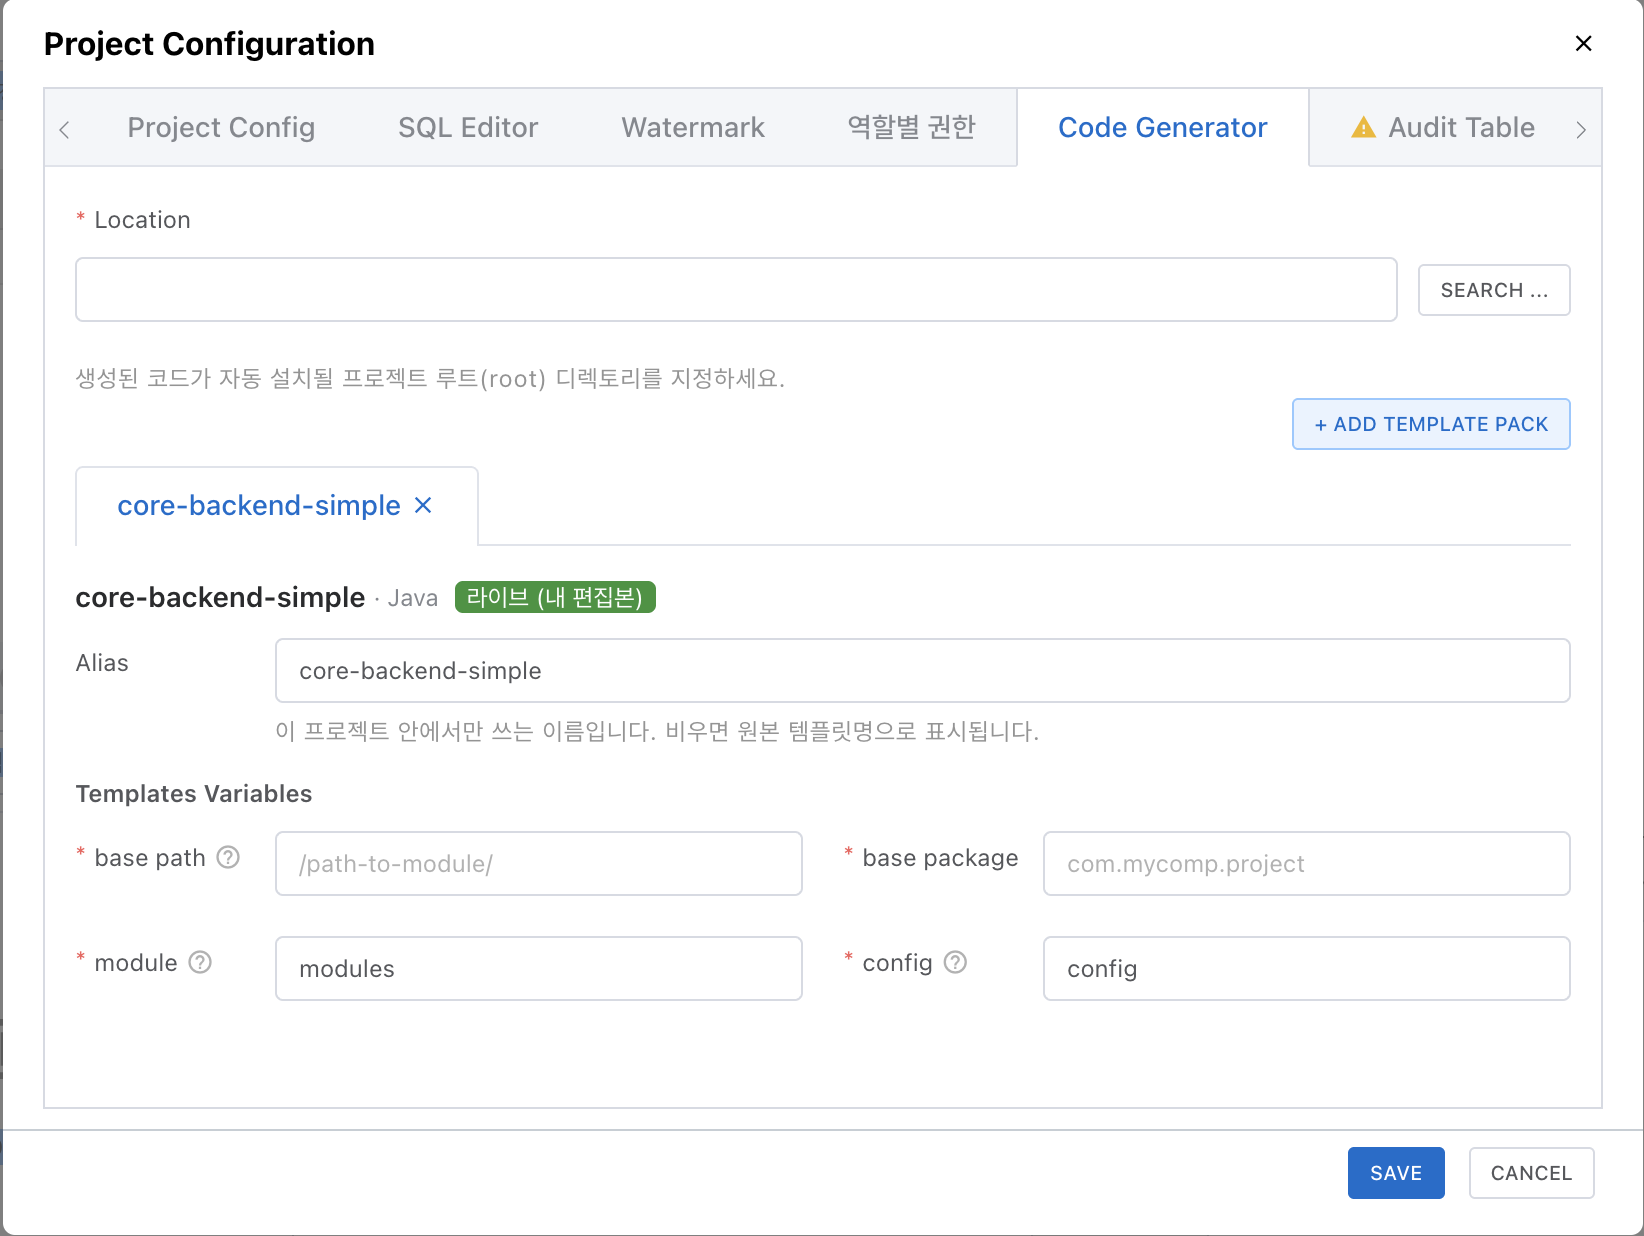
Packs you created or can edit show a "Live (my draft)" badge. In that case your draft is used directly instead of a published version — edits to templates apply to your own projects immediately, and you only publish when you want to share with others. See the Saving & Publishing guide for the difference between saving and publishing, and how to share your changes with others.
Per-Table Settings
In a project with template packs added, the table detail page shows a Code Generator tab. There you enter the table-specific data used during code generation. Every field except the required ones is optional, and blank fields fall back to defaults.
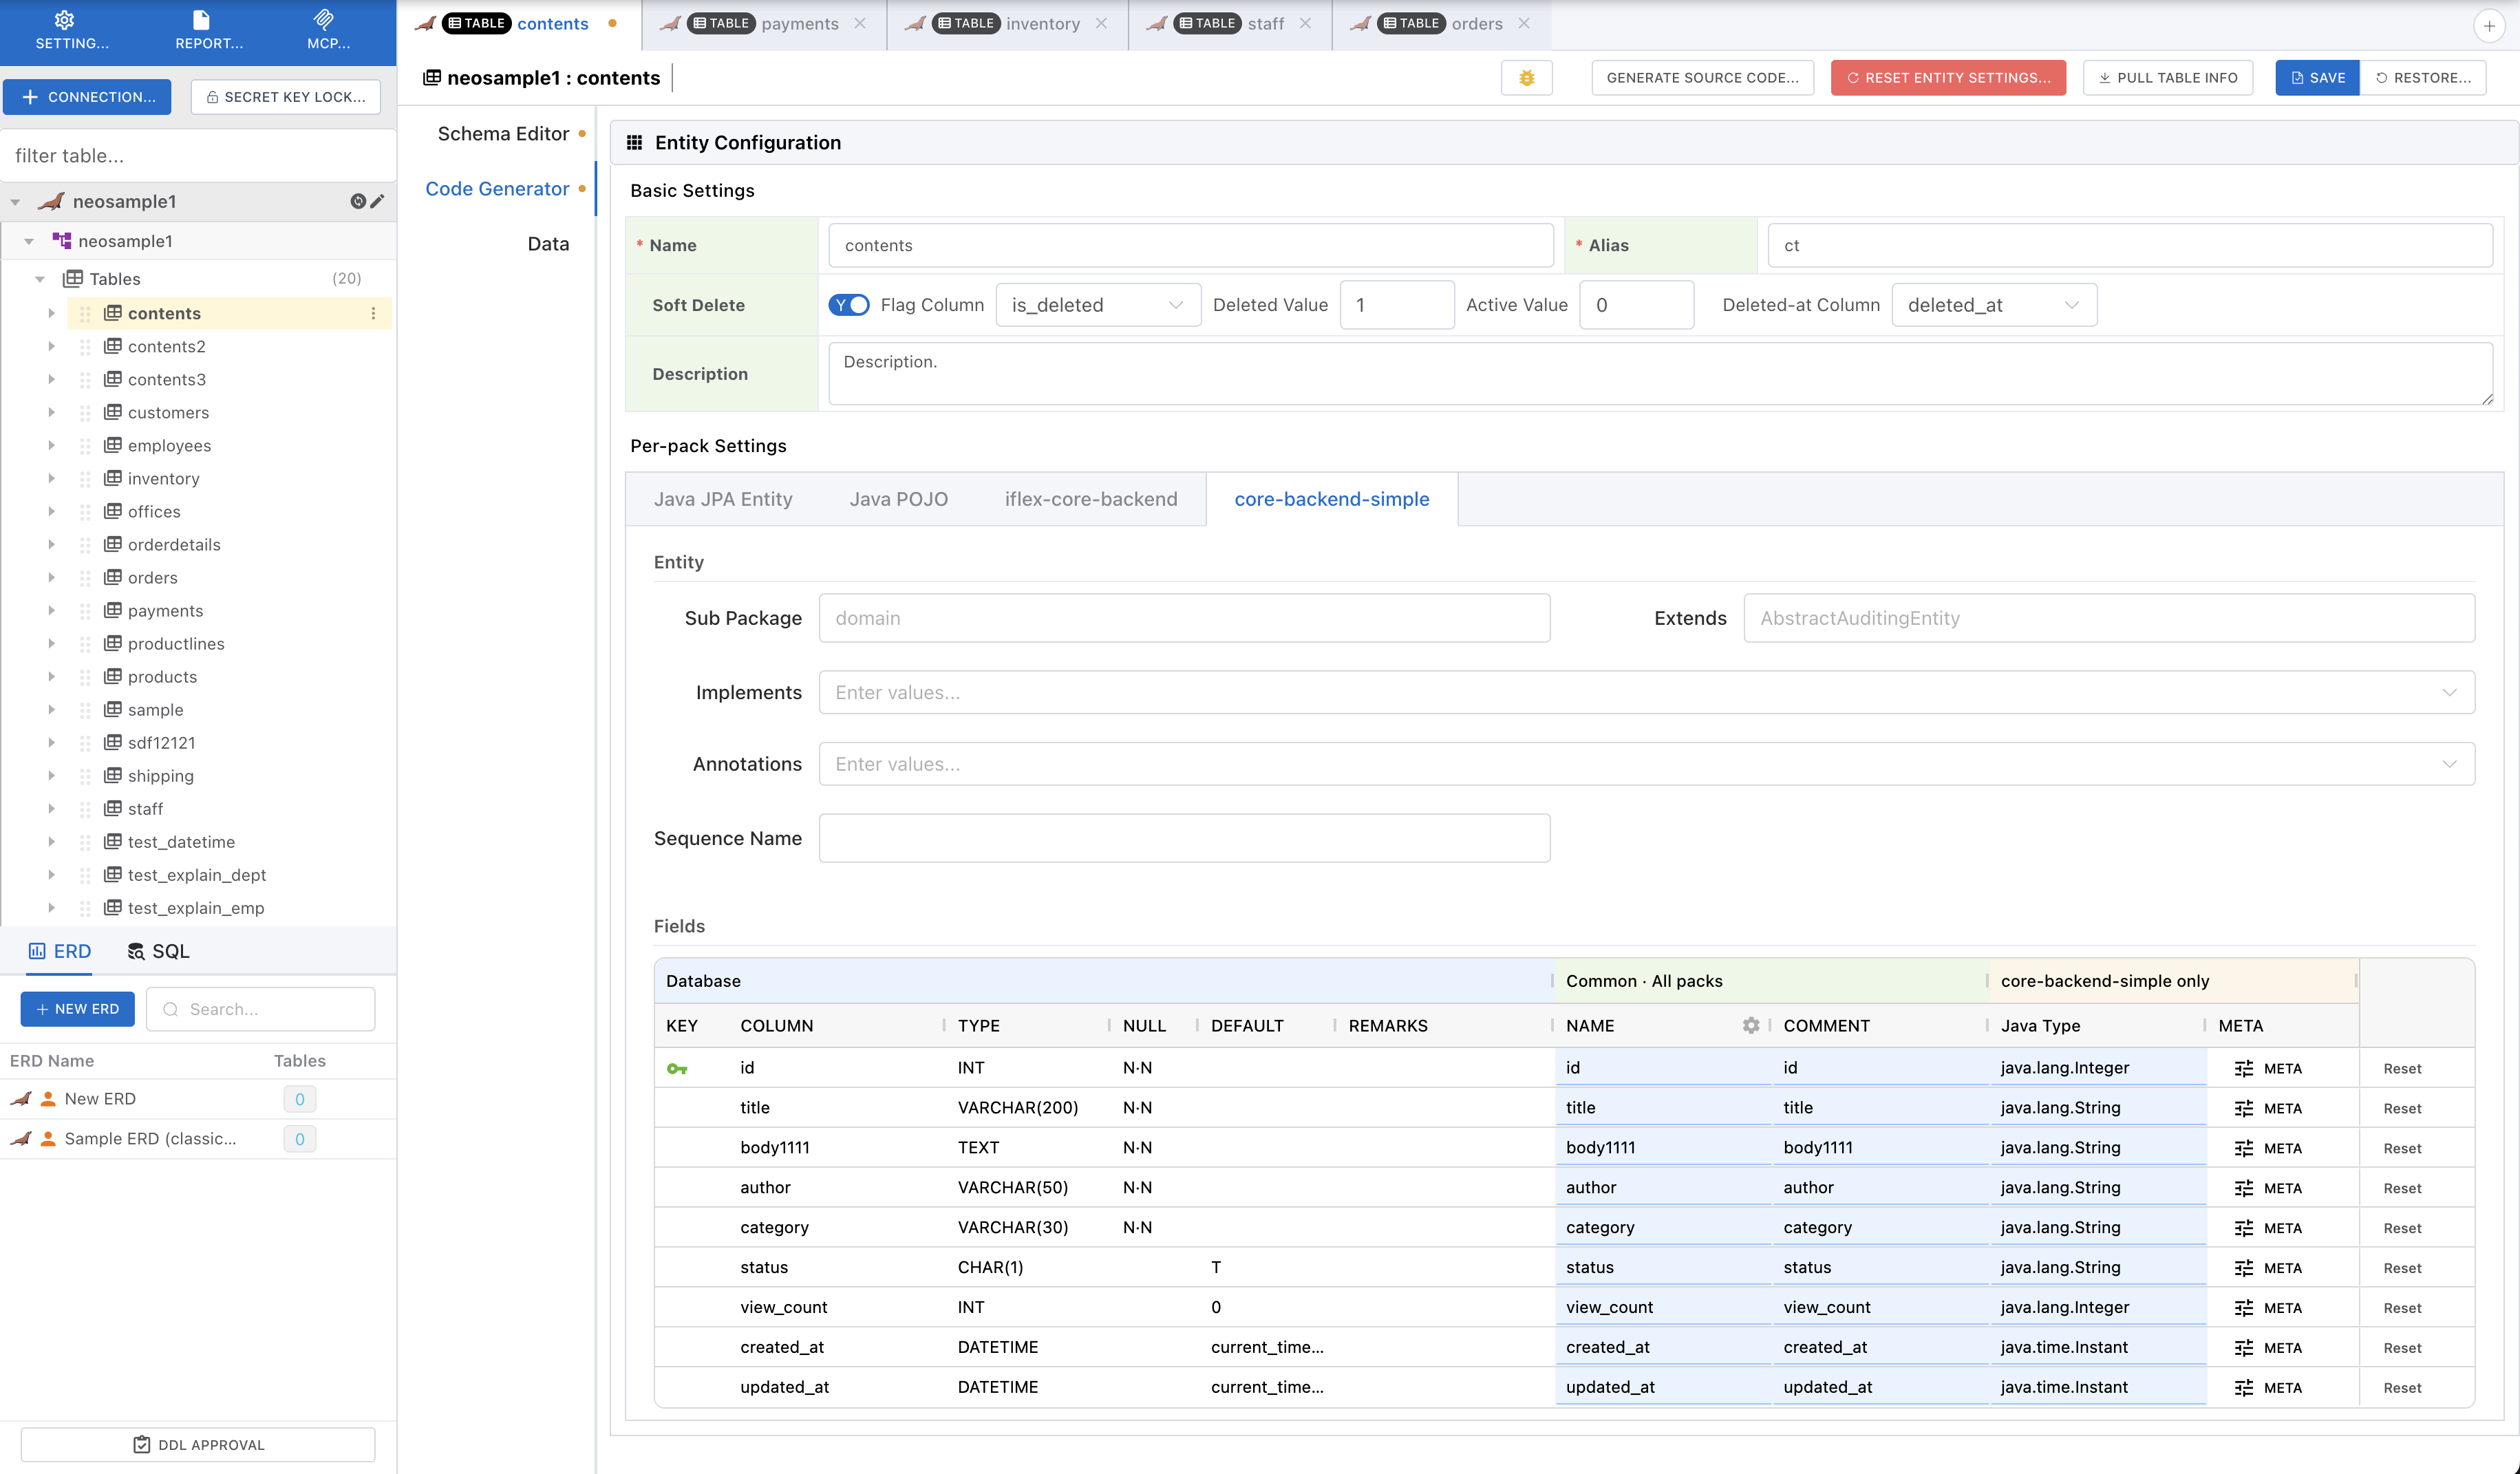
Entity settings (shared by all packs)
Set the entity name, alias, and description, plus Soft Delete options. These values are shared by every pack in the project; each field is described below.
| Item | Description |
|---|---|
| Name * | The entity's logical name. It drives the generated class and file names, and the case variants (lowerCamel, snake_case, kebab-case, etc.) are precomputed from this value for use in templates. |
| Alias * | A short table alias that refers to this entity (table) in the generated SQL/queries. It defaults to the lowercase initials of the entity name (e.g. UserAccount → ua, User → u) and can be edited. |
| Description | A description of the entity, used in the generated code's class comments and similar places. |
| Soft Delete | A switch that turns logical deletion (via a flag/timestamp column) on or off instead of physical deletion. When on, the sub-fields below appear; when off, all sub-values are cleared. |
| └ Flag column | The column that indicates whether a row is deleted. Only text, boolean, or numeric columns appear in the list. |
| └ Deleted / Active value | Entered only when the flag column is not boolean. Specify the values that represent the deleted and active states (e.g. 'Y' / 'N', 1 / 0). |
| └ Deleted-at column | The column that records when a row was deleted. Only date/time or text columns appear in the list. |
| └ Date format | Entered only when the deleted-at column is a text type. Specify the stored format using the current connection DBMS's date-function format style; it is used verbatim in the generated SQL (e.g. MySQL %Y-%m-%d, Oracle YYYY-MM-DD). |
Per-pack settings
Below that, one tab per pack appears. Each tab renders the entity-variable form declared by that pack and a field (column) grid, and the values are stored separately per pack.
| Item | Description |
|---|---|
| Type | The pack's language profile maps DB types to target-language types automatically (e.g. BIGINT → java.lang.Long). Pick another type from the dropdown or press Enter to type one directly. |
| NAME (field name) | The DB column name converted by the Column Renamer rules. Adjust the rules per table or edit names directly. |
| META | Add per-field meta attributes (key-value) used only by this pack. |
| Reset | The row reset button re-applies the renamer and reverts this pack's edits for that row. |
Generating Source Code
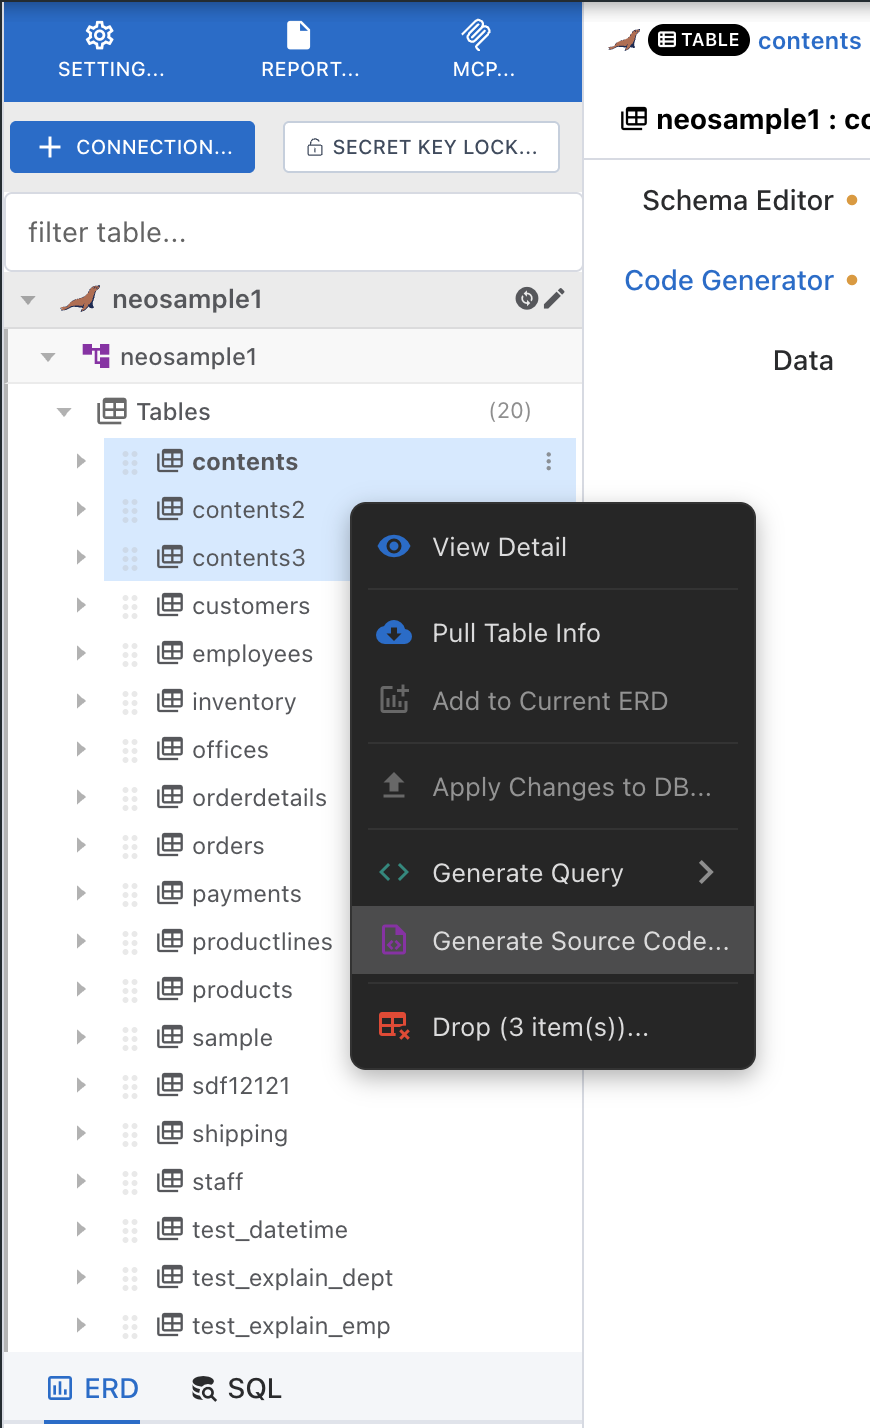
Right-click a table in the sidebar tree and choose "Generate Source Code...". Ctrl/Cmd-click or Shift-click to select multiple tables first, then right-click to generate them all at once.
The left side of the modal shows the template tree of every pack in the project; the right side previews the rendered output of the selected template. With multiple tables selected, switch between them using the "Preview table" selector at the top.
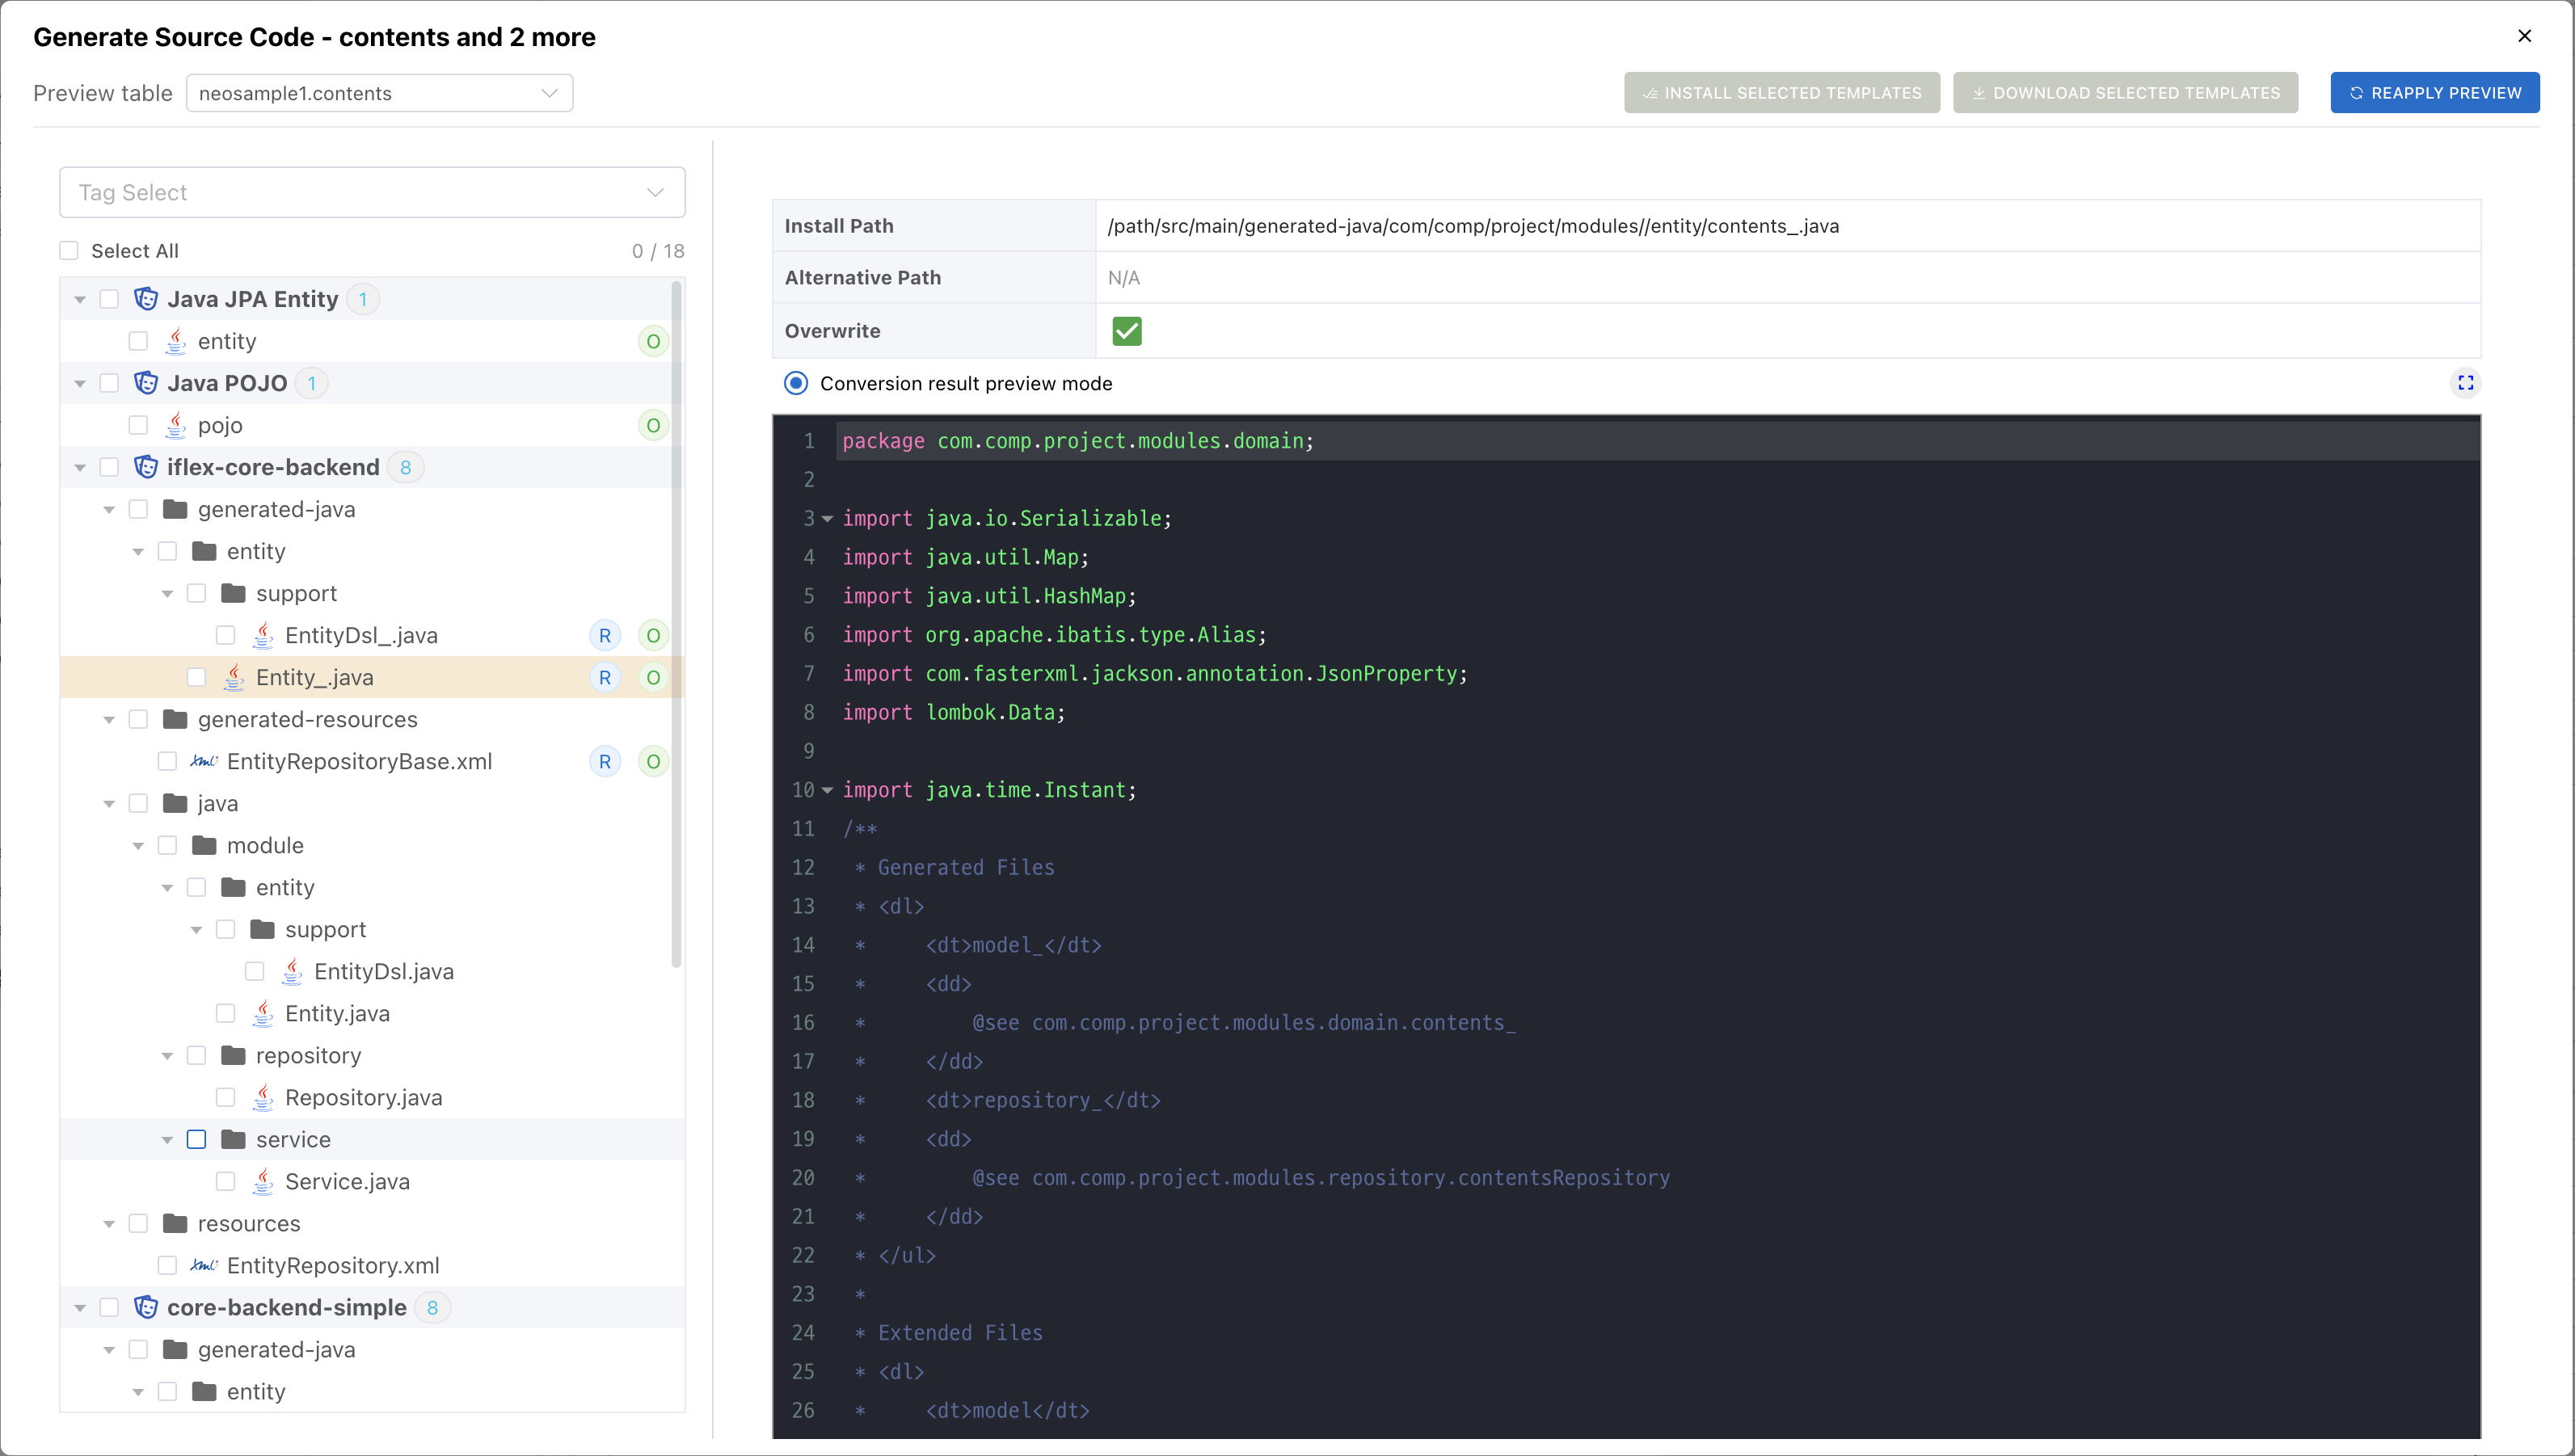
| Button | What it does |
|---|---|
| Install selected | Writes the checked templates' output files under the Location path. Enabled only in the desktop app with a Location set. |
| Download selected | Downloads the checked templates' output as a ZIP. Available on the web too. |
| Re-apply preview | Re-renders the preview after you change table settings. |
| Tag filter · Select all | Filter templates by tag, then check everything visible in one click. |
Note: During install, per-file behavior (overwrite, read-only, git add) follows the Installation rules defined on each template. You can also tweak the rendered output in the preview and install it individually with "Install this template only".
Using Public Packs
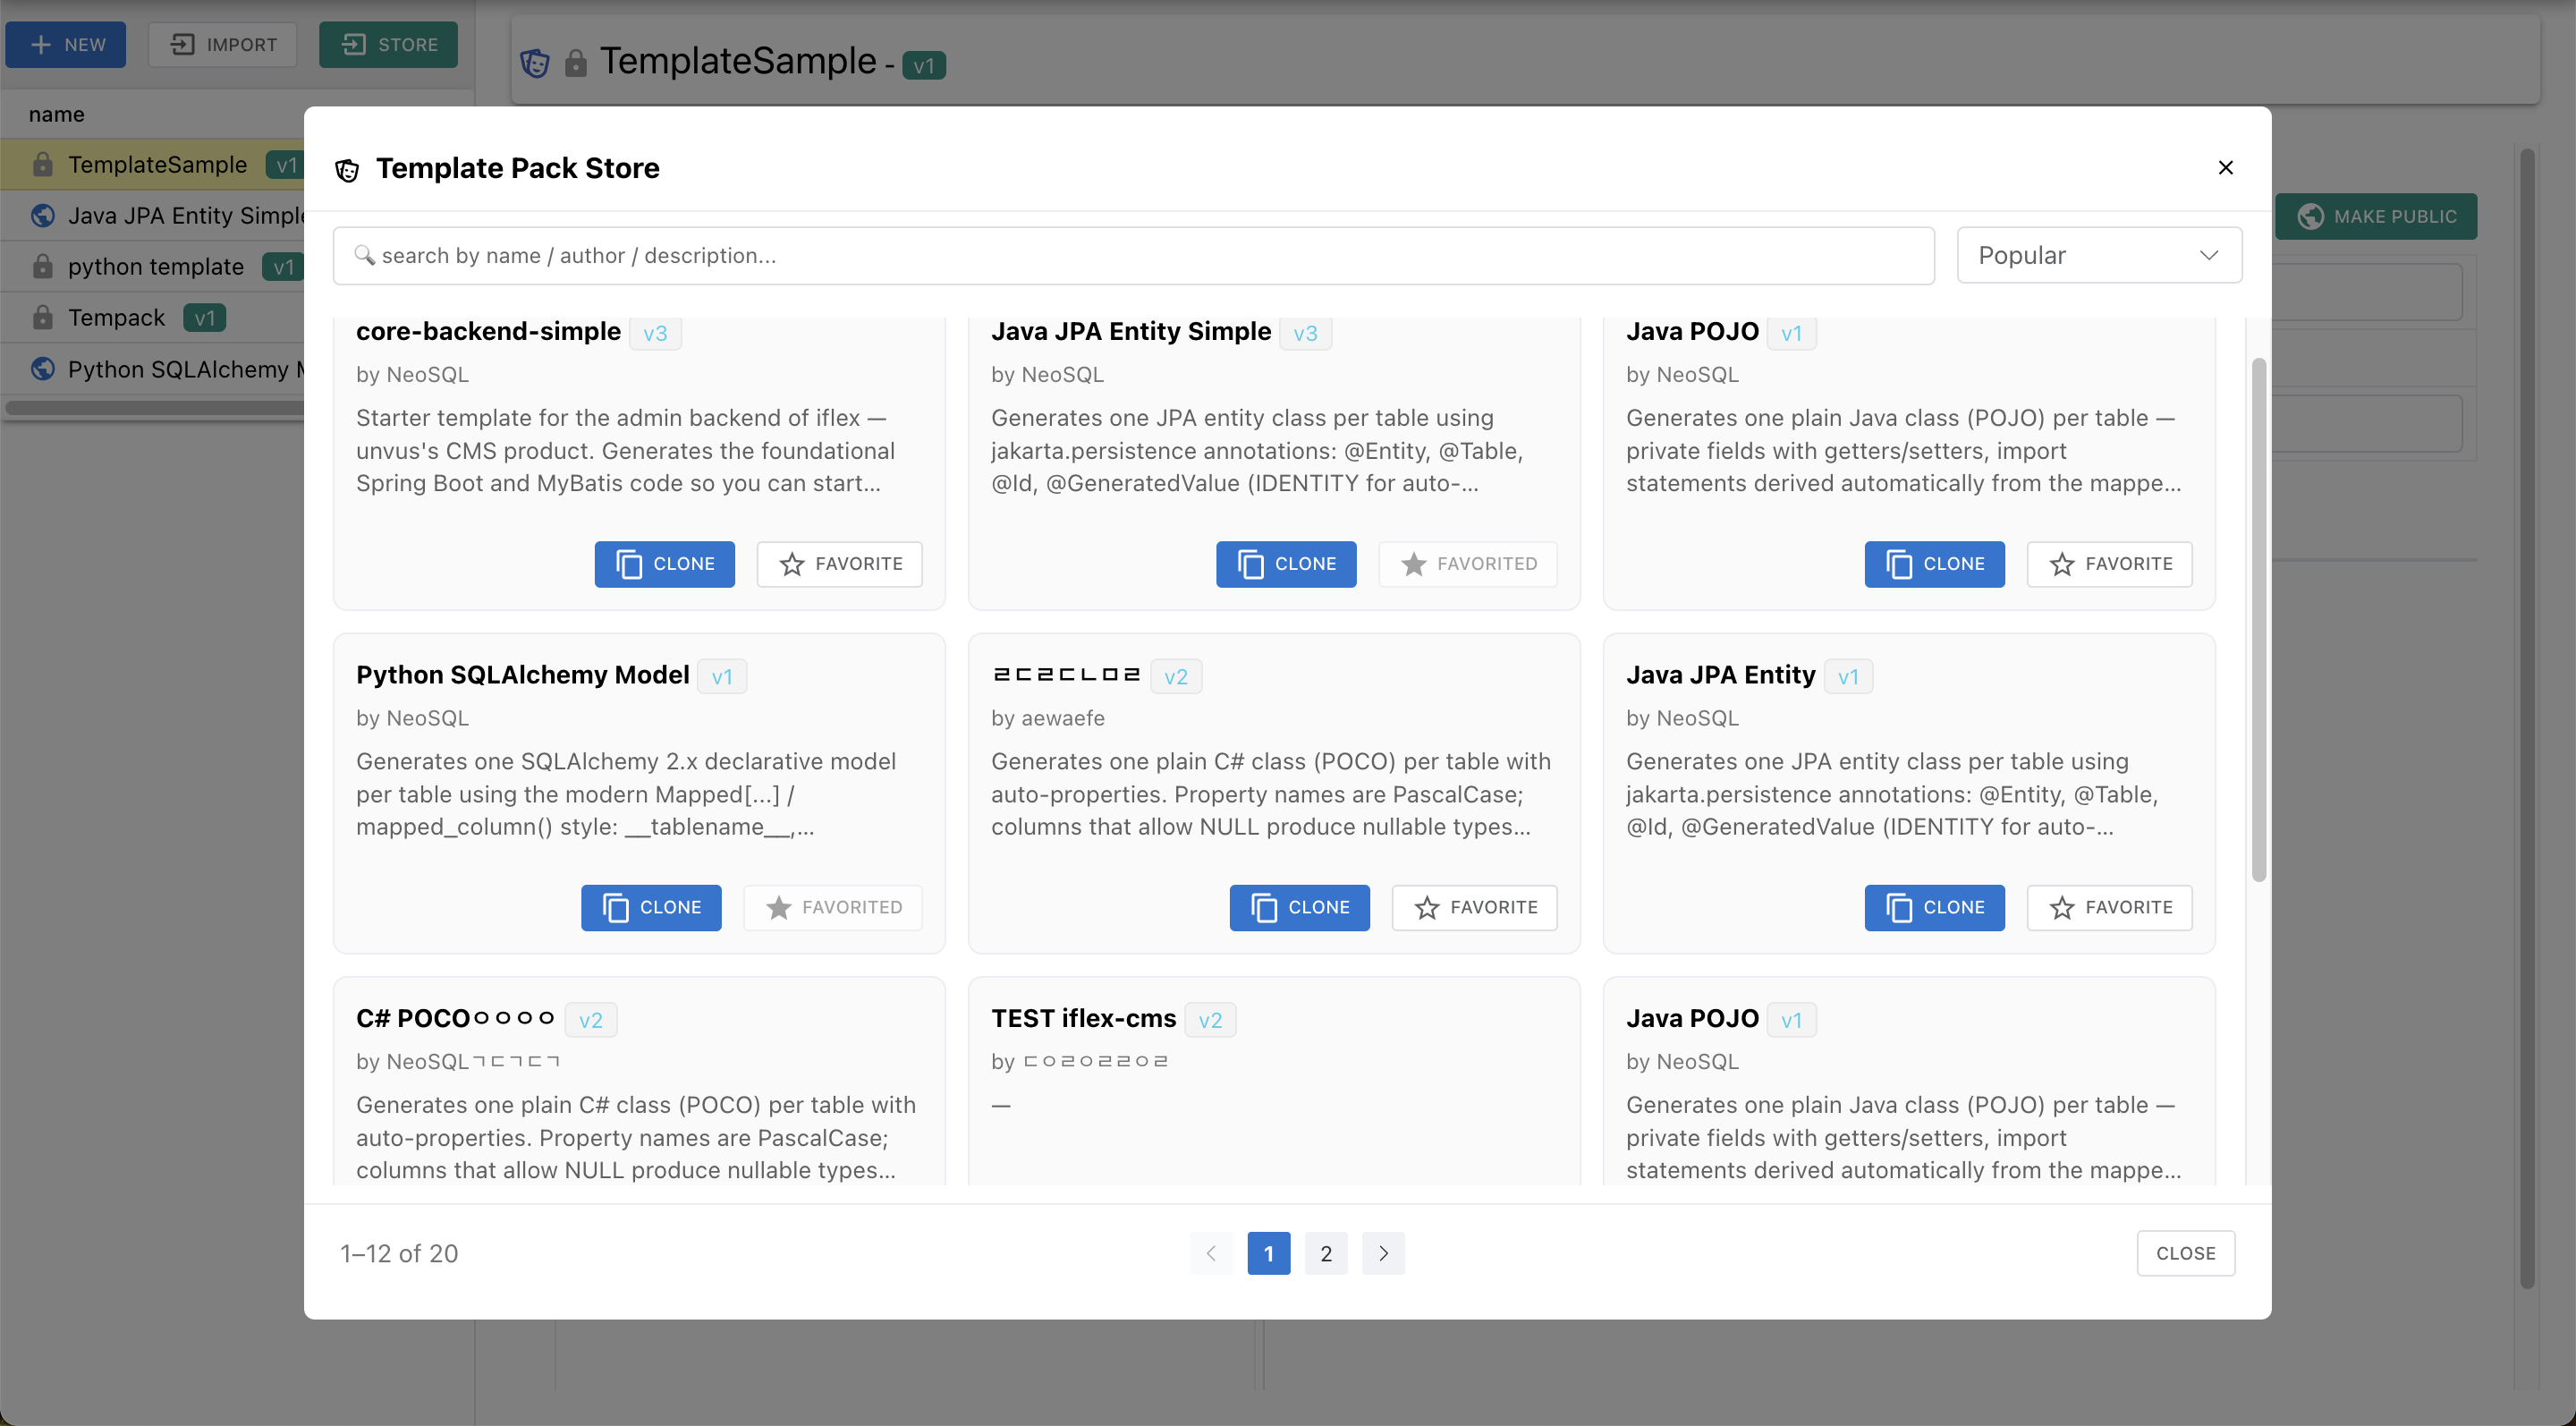
Open the Template Pack page from the left menu and click [Store] to browse published packs. Besides adding them to a project, there are two more ways to use them.
| Action | Meaning |
|---|---|
| Clone | Creates a copy of the pack under your ownership. The cloned pack is managed independently of the original and can be edited freely. Use it to build a pack that matches your team's or project's coding conventions, based on a public pack. |
| Favorite | Adds the pack to your favorites as read-only. A favorited pack cannot be edited; when the original author publishes a new version, you can update to it. To edit the templates, Clone it into a pack of your own first, then edit. |
If you'll use a pack as-is without modifying it, you don't need Clone or Favorite — just add it directly with [+ Add Template Pack] in Project Configuration.